3D Pieced Paper Ball Ornament (Paper Christmas Decorations; Day 6)
….on the 6th day of Christmas my blog friend gave to me….


Wow! Three for the price of one, you all know I love a deal!
Okay, so technically they are all the same basic principle, but it is fun to see what can be done.
Pieced Ball Ornament


First cut out 20 circles. Mine were about 1 1/2 inch wide.
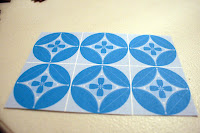
Then you will need an equilateral triangle template that fits inside the circle (see image above).

Fold the papers around the triangle, so they look like the pieces above. Then lay them out like shown. 2 sets of 5 pieces with the tips into the center. Then 10 pieces laid out alternating up and down. Glue the flaps that are next to each other together.
The 5 piece top will take on a rounded shape (see below). The ten pieces will be a straight line.


Now, take the straight line of pieces and glue the two end flaps together to form a ring.

Lastly, simply glue the top and bottom rounded piece to the ring and you are done.

2nd Pieced Ball Ornament


While making the last one I realized that you could forgo the ring if you cut out and ellipse instead. Then use a diamond shape(two equilateral triangles, end to end) instead of the single triangle. So you cut out only ten ellipses. And fold the diamond shape into them, like shown above. Lay them out in two 5 piece circles. Then glue the flaps of the pieces next to each other.
Now you would have two tops. Fold a small seam at the center of the diamond (right past the flaps that are glued together. Now just put the two pieces together, and glue the flaps. I am thinking just now that I should have taken more pictures. Sorry!

Cube Ornament
I fount the template print-out for this ornament here. Check it out, there are two more options as well.

It is not necessary to print out the template if you don’t want to. Simply cut out 6 cubes of the same dimensions. Mine were approx 1 /2 inches square. Then fold in the corners of each cube, so that all the corner points touch in the middle.
After folding them in, if you would like to have just the rounded edges, like in the template above, simple cut off the corners. But I liked the points, so I left them.


Now add glue to the corner flaps, and glue one more cube to each flap (flap to flap)


Glue those corners together. Then add glue to the top pieces flaps and glue it in place.
I was thinking that this would be the perfect project to embellish, with rhinestones or stickers on each side of the cube. It could be perfect for a child’s craft.
The one and only Martha Stewart is the source for the first and third ornament. Polyhedron and cube.
Cassity Kmetzsch started Remodelaholic after graduating from Utah State University with a degree in Interior Design. Remodelaholic is the place to share her love for knocking out walls, and building everything back up again to not only add function but beauty to her home. Together with her husband Justin, they have remodeled 6 homes and are working on a seventh. She is a mother of four amazing girls. Making a house a home is her favorite hobby.


>so cute!
We made these when I was in fifth grade (1978) out of old christmas cards and used yarn for the holder. I attempted to replicate it with my kids last year! Thanks for the tutorials!
I love your ornaments and you really explain how to make them with confusing me.