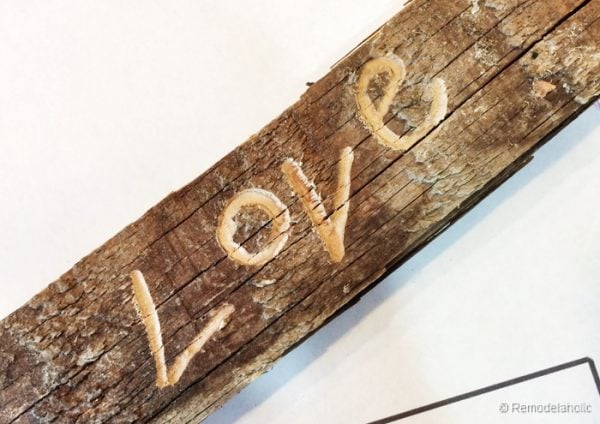
Carved Love Sign
A while ago, I tried to do the 31 days of posts thing and failed miserably (granted, I was doing it in addition to my regular everyday posting schedule…), but at least I introduced you to us and that was worth a shot. One of the things I talked about is that my dad is a chain saw wood sculptor. Growing up he always smelled of fresh cut wood — a smell that I love to this day!
Around my parents’ house there are a lot of very cool carved signs. My dad used rotary tools to create these signs and add details to his carvings. I’ve been wanting to make a carved sign for years! And so, when I was asked by Dremel to try out a new version of their rotary tool, I said: yes, I have just the project in mind! Happily, this project was done using just one single tool… a Dremel 3000, Rotary Tool![]() you can pick it up at your local Home Depot.
you can pick it up at your local Home Depot.
We bought got our first Dremel back in college and have been using one for 12 years! It is a great tool. We use ours all the time while remodeling. Check out this post about 10 ways to use a Dremel. This project took about 2 total hours, plus drying time! Is REALLY easy and super cute (IMHO)!

Carved LOVE sign!
Supplies:
1 piece of wood the proper size (I used a leftover piece of a pine 1 x 12 we got in the Lumber dept of Home Depot)
Paint or Stain, Paint Brush & Rag
Art Hanging Hardware
1. Cut The Wood
Start by cutting your wood to length, mine is 32″ long. You can do this at your local Home Depot when you buy the wood or at home.

2. Color Wash, Stain or Paint Your Wood
I chose to color wash my wood, so the grain of the wood shows through the paint. This is a technique I learned years ago when crafting with my sister and I love it! You can even use it to darken an existing (unfinished) stain like I did here on our Dutch barn door.
Color Washing Wood with Paint:
A. Take any regular paint color that you like. I wanted the word to pop so, I picked a color that had a high contrast to the natural wood color. I used left over paint that I had on hand, the color is Deep Sea Dive SW 6718.

B. In a small bowl add about a half cup to 1 cup of paint(once you add the water, you can’t save it, so don’t over do it). Thin with water, I poured in a little at a time so that it is still thick but runnier. Mix with your paint brush. Do not thin it too much. The thinner the paint the lighter the color, and vice versa.

C. Quickly paint your wood. I chose to not paint the sides of my board, just the front of the board, so be careful of drips, since the paint is thinner, if that is what you want to do.
D. Do not allow the paint to dry. While it is still wet, use an old rag to wipe off the excess paint. For light colors, wipe off the paint with more pressure until it is the desired color. For a darker color, don’t thin the paint as much and wipe the excess off with less pressure. Repeat until you have the desired color and wood grain showing.

E. Let board dry completely. (Sand edges of board for a slightly faded look)

3. Transfer Text to your Board.
We designed the text to fit our board(shown below) and printed it like a poster, in several pieces.

Tape the pieces together.

Center the design on the board. Using carbon paper and a pen or pencil, transfer the text to the board.


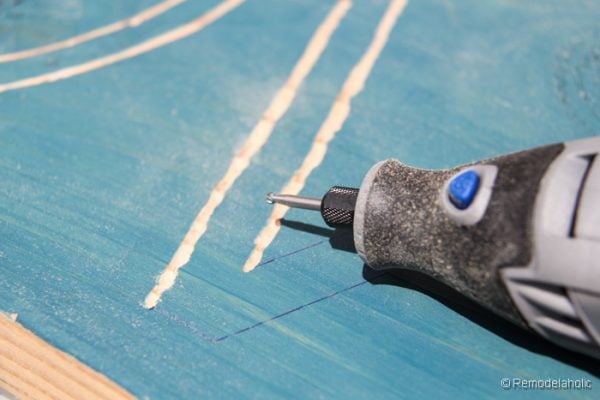
4. Carve!!
With your Dremel rotary tool, and the high speed cutter attachment, follow the lines of your text carefully. It is good to test on a piece of scrap wood first! We did on just a tiny old scrap…
Try to keep the tool cutting at the same depth. For the overall look, we decided to do an outline of each letter, but you could totally carve out the inside of each letter, too. It is up to you!
5. Attach Hanging Hardware.
Use a picture hanging system that can hold some weight. Our sign is REALLY heavy. We used two screws in a stud on the wall to hang it. We wanted it to be absolutely secure!!

And we put it up on the wall… I “LOVE” it!

So the cool news about Dremel is that the have a new add-on accessory, Dremel EZ Lock. The EZ Lock system is really, well, easy. A simple push and twist is all it takes for a nice tight hold on certain bits. I was really impressed with how simple it was to switch and lock on a new cutting wheel. You no longer have to use a tiny tool to switch the wheels with the right attachments. I love it when I see tools evolve and just keep getting better and better, and since we’ve had a Dremel for years it is great to see their fun innovations! You can pick up a Dremel for $59 bucks at the Home Depot! The EZ Lock Cutting Kit will be $14.97 which is a great deal!
**Thanks to The Home Depot and Dremel for sponsoring this post.
Cassity Kmetzsch started Remodelaholic after graduating from Utah State University with a degree in Interior Design. Remodelaholic is the place to share her love for knocking out walls, and building everything back up again to not only add function but beauty to her home. Together with her husband Justin, they have remodeled 6 homes and are working on a seventh. She is a mother of four amazing girls. Making a house a home is her favorite hobby.


I love this kind of stuff! It is so cool. I love how you washed the paint on and how you used the dremel tool. I am definitely going to be on the lookout for this tool at garage sales this summer.
Love the sign!! How fun to use a dremel to carve the letters out. Pinning 🙂
That is so cool!
THANK YOU!
i too learned to make my own stain by mixing water, and I have saved it in a sealed container for future use! I love the engraving idea!
Thank you, Brenda!
Great idea! I love it. Please correct me if I’m wrong, but I understood you to say that you could not store the washes. I keep several colored washes mixed up for use and store them in the inexpensive plastic containers with the screw on tops from Dollar Tree. They keep well.
Thanks for sharing your experience, Glenda! I will have to try that.
I wonder how using this paint technique would work on steps with a couple coats of varnish on them? I’ve been wanting to do something “creative” on my steps instead of just staining them. I’m crazy over grays and teal so this would look amazing!
The varnish would make it more of a lighter wash than a deeper stain like this, I imagine… but I’m sure you could figure something amazing out! 🙂 Thanks for commenting!
I love your work! Very inspirational! I NEED to know where you got your rug!?!?
Thank you, Lisa! I got my rug from Wayfair — but there’s more info in this post: https://www.remodelaholic.com/2013/09/new-living-room-rug/.
That was so helpful. I have been wondering how to do this for years. I want to do this to a bathroom vanity. Should I varnish it afterward and what would be the best way to do that?
Yes, I would finish it with a good topcoat. Keep in mind that if the vanity already has a finish on it, the colorwashing might not stick as well as it does to bare wood.
This makes me realize I really need a dremel 🙂
It’s such a great tool! 🙂
Hi Cassity!! I am SO making this LOVE sign. It will be a great addition to my gallery wall. I would love to know more about the three blue and white square pictures on the left. Did you make or buy? Thank you!!
You can create that same look with spray paint. I used a light color, spraying an area and wiping it towards the unpainted end until I’d covered the whole board. Made an awesome, rustic looking book shelf.
Good to know! Thanks for sharing, Sierra!
Just want to say your sign is cute. I may have to buy one of those tools, even though I have a million other projects going on. Lol. I even love that little sample “love” sign and i hope you kept it 🙂
You bet we did! Thanks for the comment, Michelle! And the Dremel really is a great tool!
An electric router carpenters use gives the cut of the letters a constant depth…. and has a guide bar for straight lines. A bigger tool than a dremel of course.
I`m hoping i can use gloss paint thinned with white spirit on bare wood? Or artists oil paints ? linseed oil maybe?
Great work……love the Jesus picture….where did you get it?
Thanks, Kylie! That’s one of my favorite pieces of art — it’s called Rescue of the Lost Lamb by Minerva Teichert. I’ve had it for years, but you can check local Christian art stores (especially if you’re in the Utah area) or even online art stores might have it — I found a seller on Etsy as well (affiliate link) –> https://rstyle.me/n/bu4pcsb5hef
Yes I love my Dremel. I’ve got the 4000 , and have only started to teach myself how to use it. No significant works have arisen from my attempts just yet, but I’m getting there!
It’s such a great versatile tool! I’m sure you’ll find lots of projects to use it on!
I love this I have a project like this I am about to try. I also would love to know where you got the rug in the picture it is beautiful and would match my decor prefectly.
There is more info on the rug here: https://www.remodelaholic.com/new-living-room-rug/
Hello… Thank you so much for the tutorial! I loved it! I just got myself the Dremel moto saw, Dremel 4000 engraver and now testing the Dremel versatip.
Loving it and reading your step by step tute helps me very much.
However I do have a question on the engraver… Which bit can I use to outline my drawing onto the board?
Many many thanks, Agnita
So glad you loved it! It was a fun project. The bit I used was a high speed cutter either a 1/8″ round end or a 3/16″. I hope that helps.
Would this work on barn wood as well?
The colorwashing will work on any unsealed wood, but if the barn wood has a rough texture, you’ll have to be careful in how you apply and wipe off the stain mix. The carving would work wonderfully on barn wood!