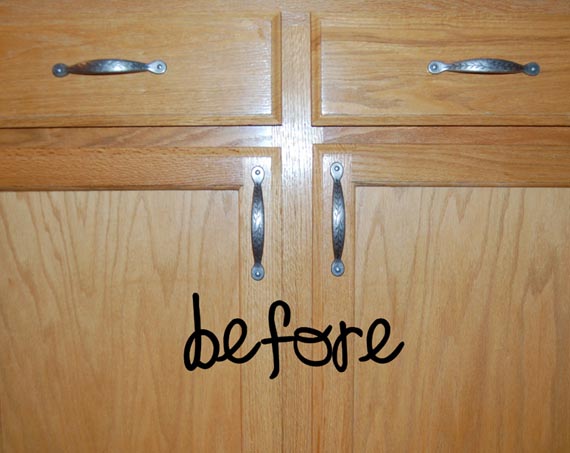
Builder Grade Cabinet Upgraded! Tutorial

I just finished my cabinet in my downstairs half bathroom that I have been working on for the past few days. It was a lot of work, but well worth it.
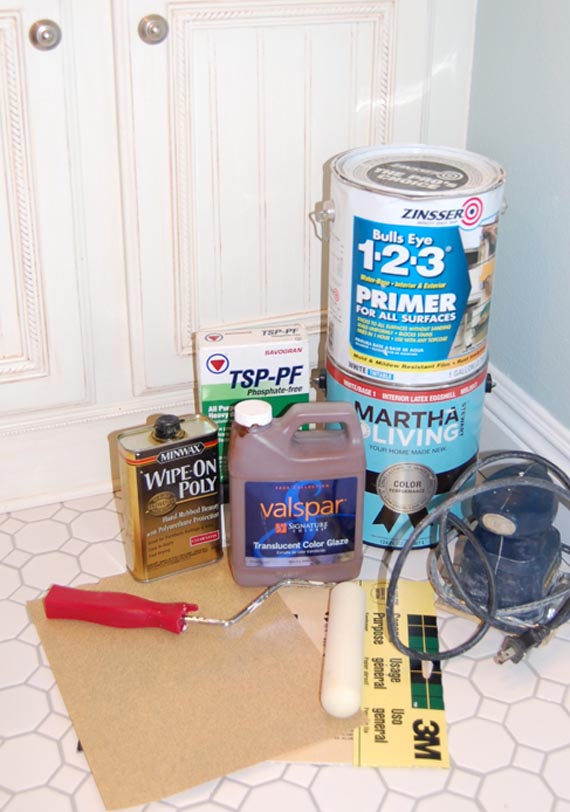
*TSP
*sandpaper
*electric sander
*beadboard
*decorative mouldings
*liquid nails
*finish nails
*primer
*Martha Stewart “Heavy Cream” paint
*Paint brushes and paint roller
* Wipe-on Poly *Valspar glaze in “Mocha”
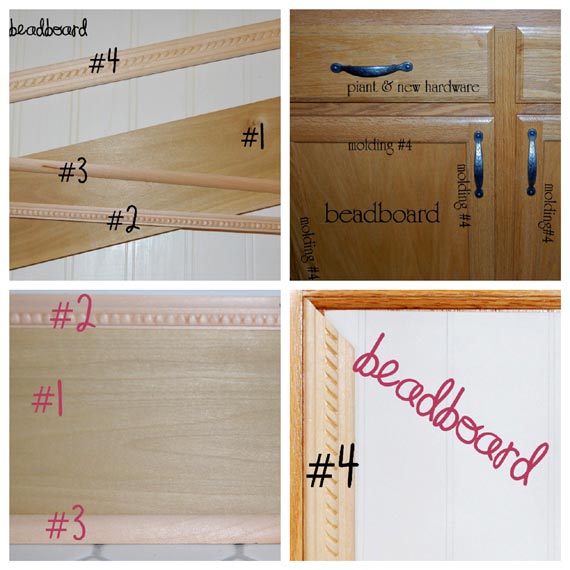
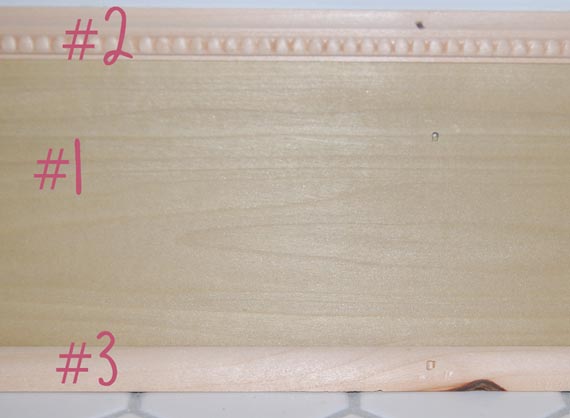
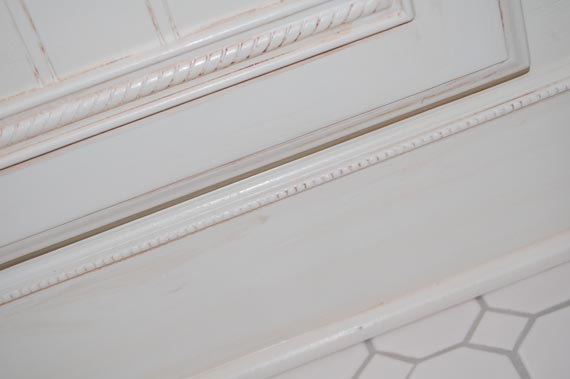
Next I measured and cut two pieces of beadbord and then glued it, using liquid nails, to the recessed part of my cabinet doors. Finally, I finished it off by framing the beadboard with a decorative a moulding. Also, I used three pieces of moldings to make a baseboard, just the perfect height, for the bottom of my cabinet.
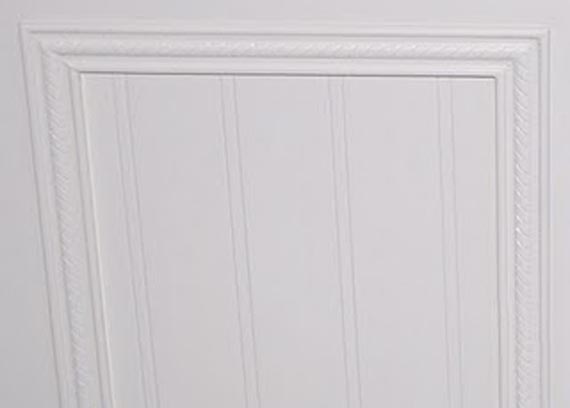
Now it’s time to prime. I used two coats of primer and then waited until the next day to apply the paint. I used two coats of paint as well. 24 hrs. later, when the paint was completely dry, I sanded the cabinet just a little bit to smooth out any rough spots or drips.
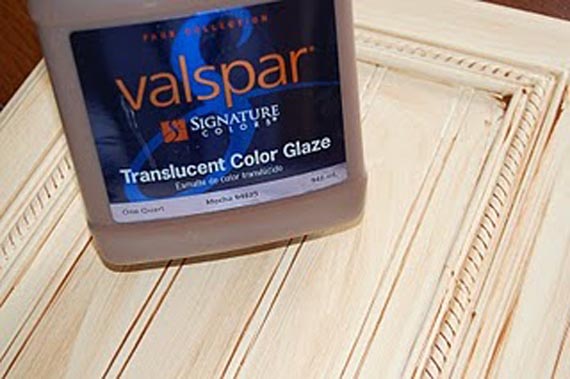
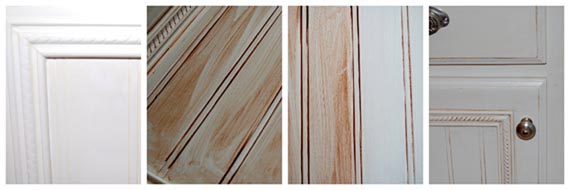
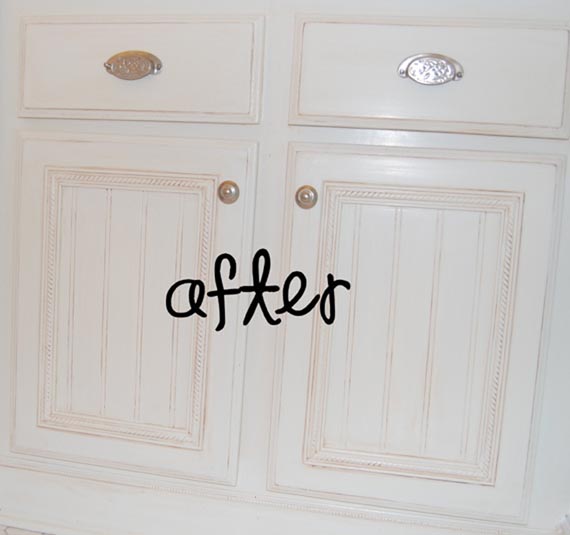
You’re almost done now…the glaze is so easy to apply. All you need to do is either wipe or brush a coat of glaze on, wait a minute or two and wipe some, most, or all of it off depending on how worn you want it to look.
The directions on the back of the glaze say to wait one week after glazing to apply a clear protective coat. I used a wipe-on polyurethane.
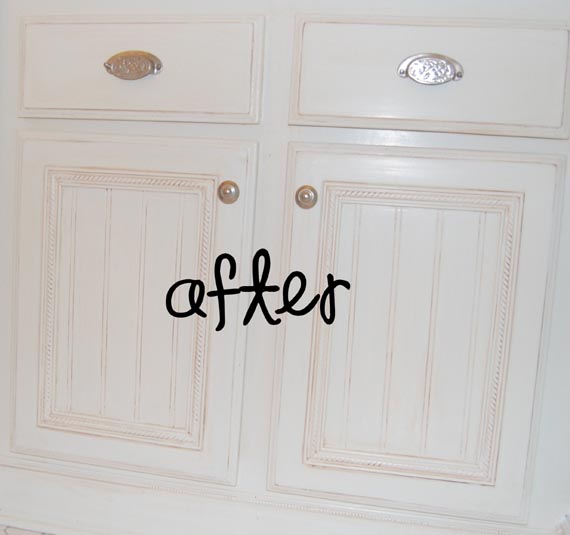
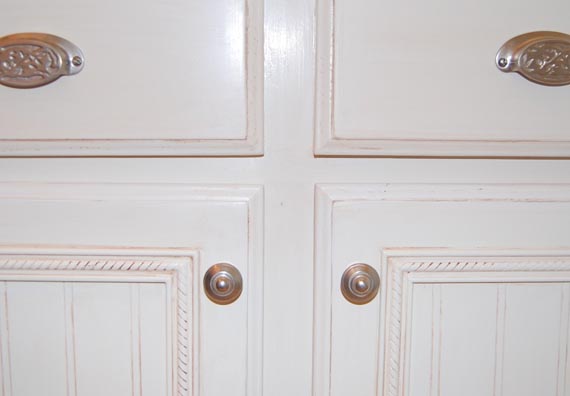
I am so happy with the end result…a beautiful, updated cabinet!
Love it!!!
Cassity Kmetzsch started Remodelaholic after graduating from Utah State University with a degree in Interior Design. Remodelaholic is the place to share her love for knocking out walls, and building everything back up again to not only add function but beauty to her home. Together with her husband Justin, they have remodeled 6 homes and are working on a seventh. She is a mother of four amazing girls. Making a house a home is her favorite hobby.


Love it! Can you share prices of the supplies?
What tool do you use to cut the moulding?
A miter saw or miter box and hand saw!
I LOVE this idea! I have bought all of my materials and I am ready to go!
But… I have one question!
On the side of the cabinet door- where the beadboard and the molding show- how do you hide the “layering?”
Do you put something over it to hide it? If so, what?
PLEASE HELP!! 🙂
Jessica, This was a guest project, so you’d have to ask them to be sure! …but from what the pictures show, you just need to butt the small #4 decorative molding on over the gap at a slight angle. Then you would just run a bead of paintable caulk down the gap and wipe it smooth so you can’t tell it is there, then paint over it all. I hope that helps!
GOOD LUCK!
Cassity
you can run some Painters Caulking on the edges that will hide it!
Oh my gosh I love it! Can you give me an idea of how much 1 average kitchen door would have cost done this way? I want to do this so badly but I have to sell hubby on the idea first!
Katrina,
Okay, so it really depend so the size of your doors, but if you buy a 8×4 sheet of bead board you could cover anywhere from 8-12 doors from one sheet @ $25.00 or less. Then the decorative molding can run anywhere form $8 -$15 per 8 feet of molding. So your average size door could take about 5 linear feet. Basically each door would cost anywhere from 8-15 dollars. You would just really need to price it out at your local hardware store. Good Luck
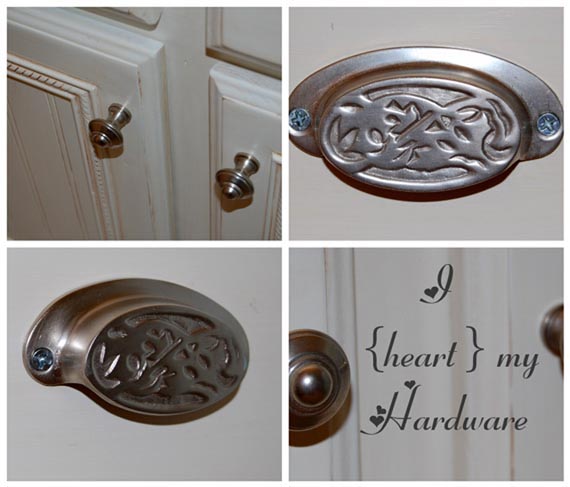
And btw I love the hardware too!! This is exactly what I want!!
Living in my grandfather’s old farmhouse I am wishing I had stumbled across your blog sooner…(we are in a constant state of reno, although my daddy did a tremendous amount of work before I ever moved in)…what a beautiful upgrade you have made to what could have been oh hum cabinets…my add-on bathroom looks like a builder just lost the last bit of gumption he had when he reached it, and I am hopeful that this (and other superb ideas you have) can be easily implemented…we live in a less than metropolitan area of NC (Lexington to be exact) and am curious what moulding sources you might use online…the teeny tiny pieces especially…I cannot wait to read more about your projects and see what you will come up with next…it reminds me just why I dig being a girl with a tool belt 🙂
Kelly, that is awesome that you found our blog helpful. We are glad that you what to read more.
I would love to see a pic of the finished kitchen.
I have plain slab doors on my kitchen cabinets. Can you add bead board and molding to dress up the cabinet face?
I’ve seen it done before, so I’d say absolutely you can!
I am in love with that hardware!! And thank you for this, getting ready to paint cabinets so I will be following step by step!!
Thanks for the comment, Laura! We’d love to see pictures!
Did you use any weights on top of the headboard so the liquid nails would adhere?
Hi Kelly,
This is an old guest post so I’m not sure if the author is still monitoring the comments — but I would say that yes, you want to have some weight (or clamps) to help the adhesive have a strong hold. We’d love to see photos if you do this, too!
Hi Cassity,
I just stumbled upon this post… I wrote it for what seems like forever ago! I stopped blogging at NestNestingNested so many years ago, but love that people are still finding this post useful. I have been following along with your blog this entire time, and love the way your style has evolved!! I recently started a new blog, LeCultivateur. I would love if you would check it out, and let me know what you think, if you have time sometime! Anyway, just wanted to stop by and say hi after I stumbled across this post on Pinterest!
Wishing you a very merry Christmas!
~Emily